To create a map, go to My Page and click “Add map” > “Upload new map” from the menu on the top right.
Clicking “Upload new map” will take you to the page (editor) where you can create a map.
From the editor, you can create maps that do not use illustrated maps and maps that can use illustrated maps and standard maps.
The former is a map that can only be used as a standard map, and can be created even if you do not have an illustrated map.
The latter is a map where you can use uploaded illustrated maps.
Also, after publishing a map that does not use illustration maps, you can change it to a map that does use illustration maps.
From here, I will explain the flow of creating a map.
A)Maps that do not use illustrated maps
B)Maps where illustrated maps and standard maps can be used
■Process for publishing a map
A)Maps that do not use illustrated maps
1.Go to editor page.
2.Set a spot to set the range to use the map.
Set the range where the map can be used at the spot location.Outside this range, the current location cannot be displayed using the GPS button.
※To publish, you must place two or more spots.
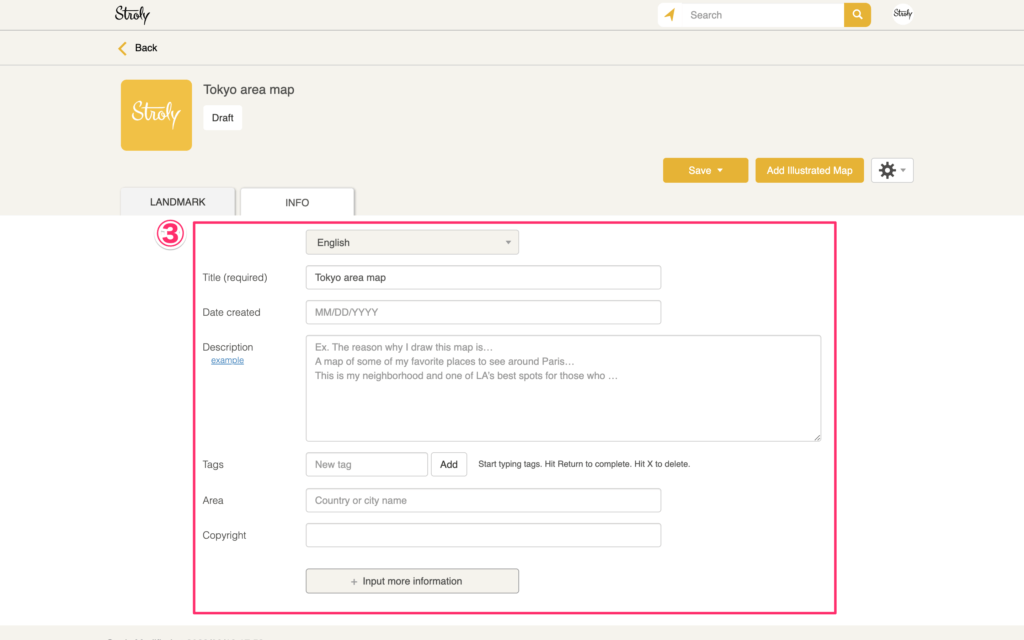
3.Enter the necessary information in “INFO”.
Title is required.
4.Click “Save” > “Save” to save the configured information.
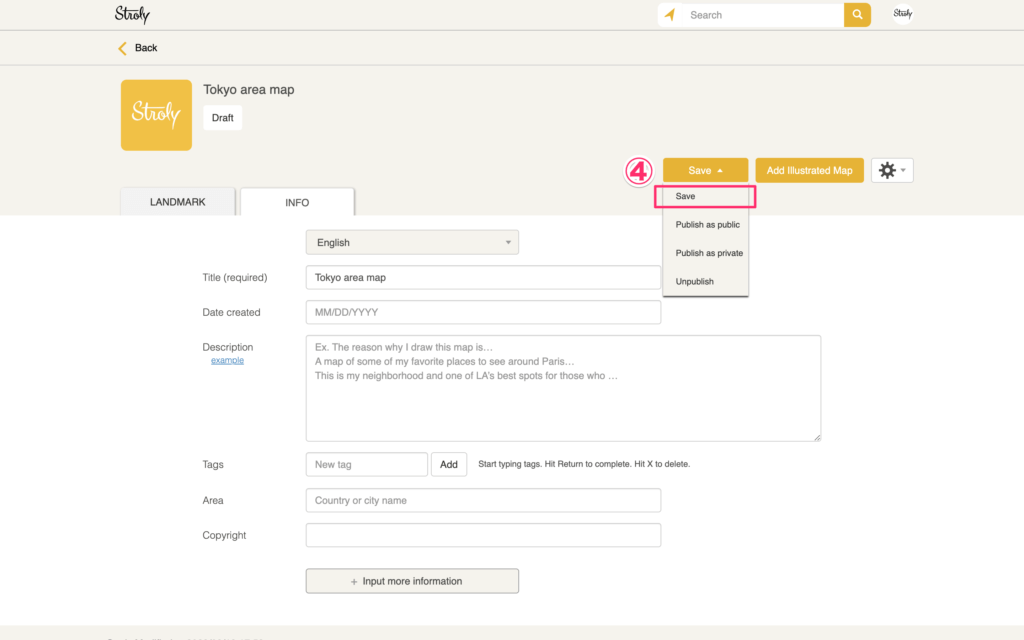
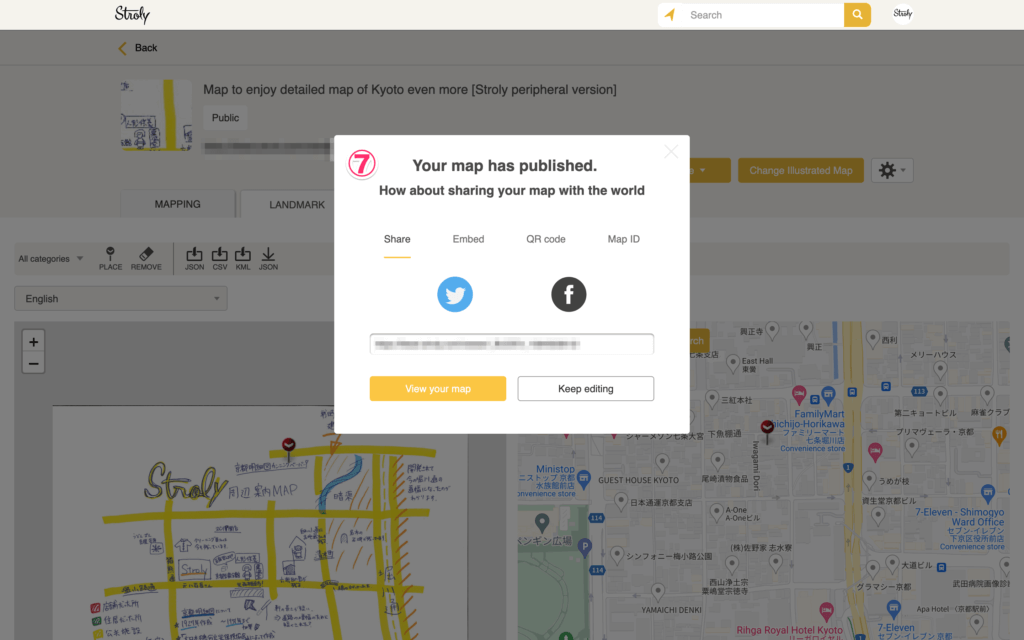
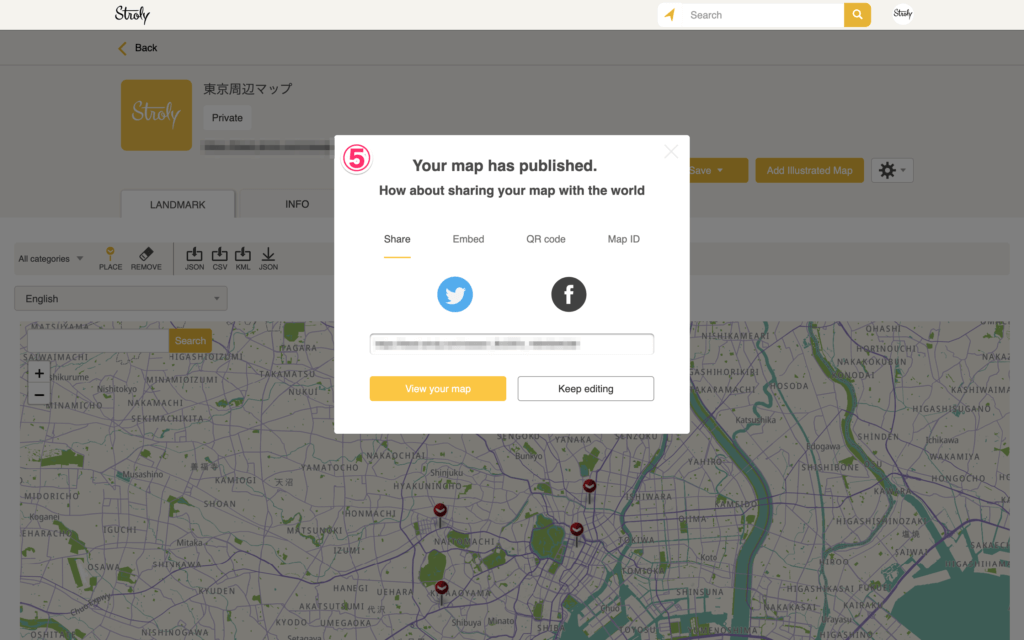
5.Click “Save” > “Public” or “Private” to publish the map.
By uploading an illustration map after creating a map that does not use an illustration map, you can create a map that can use illustration maps and standard maps.
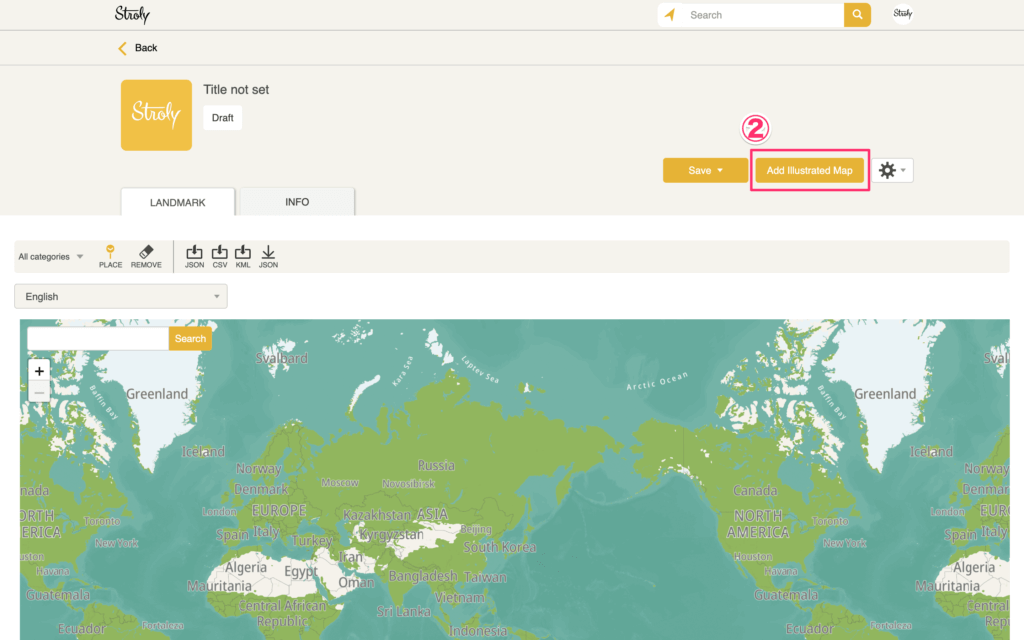
Click “Add illustration map” in the upper right corner and upload your illustration map.
After uploading, please refer to ③ onwards in “B) Maps where illustrated maps and standard maps can be used”.
※After uploading an illustration map, you cannot change it to a map that does not use an illustration map.
B)Maps where illustrated maps and standard maps are available
You can also add an illustration map to a map that does not use an illustration map using the same procedure as below.
1.Go to editor page.
2.Click “Add illustration map” to upload the illustration map.
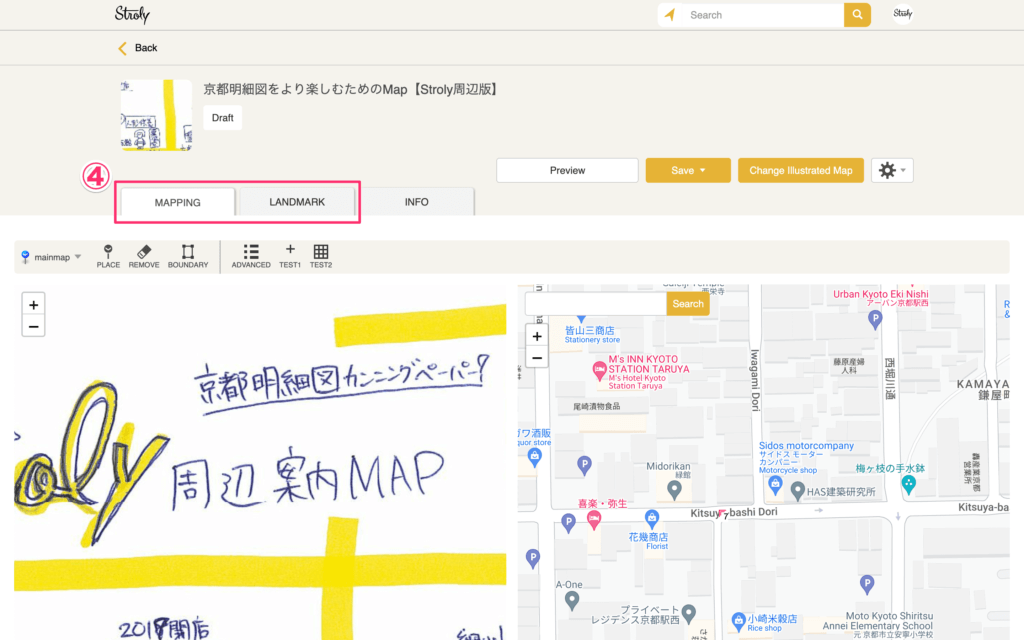
3.After uploading the illustration map, the “MAPPING” item will be added.
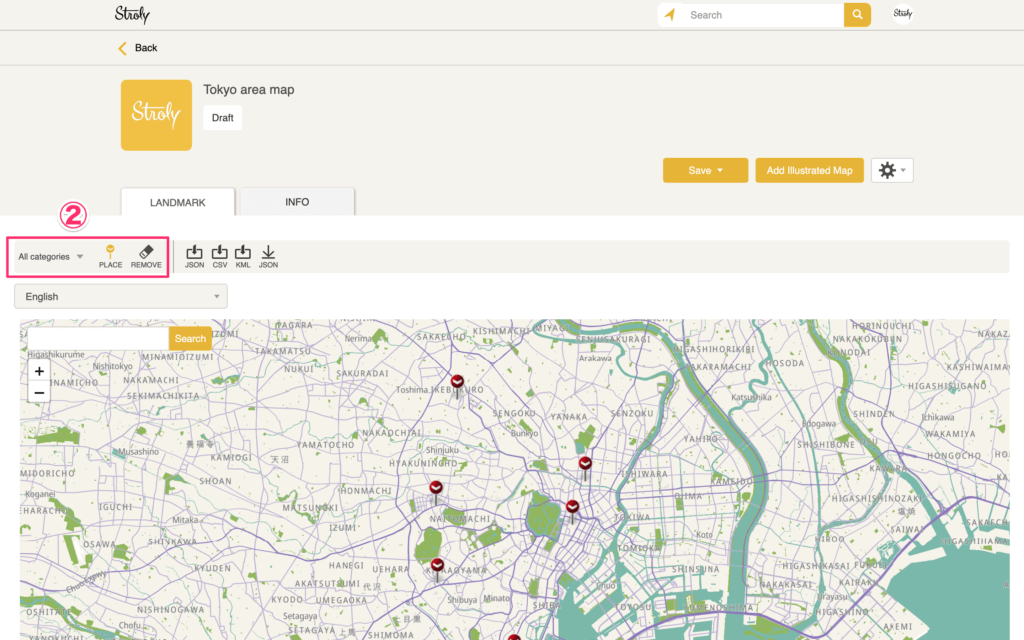
4.Set “MAPPING” and “LANDMARK”.
To publish, you must place alignment pins in three or more locations.
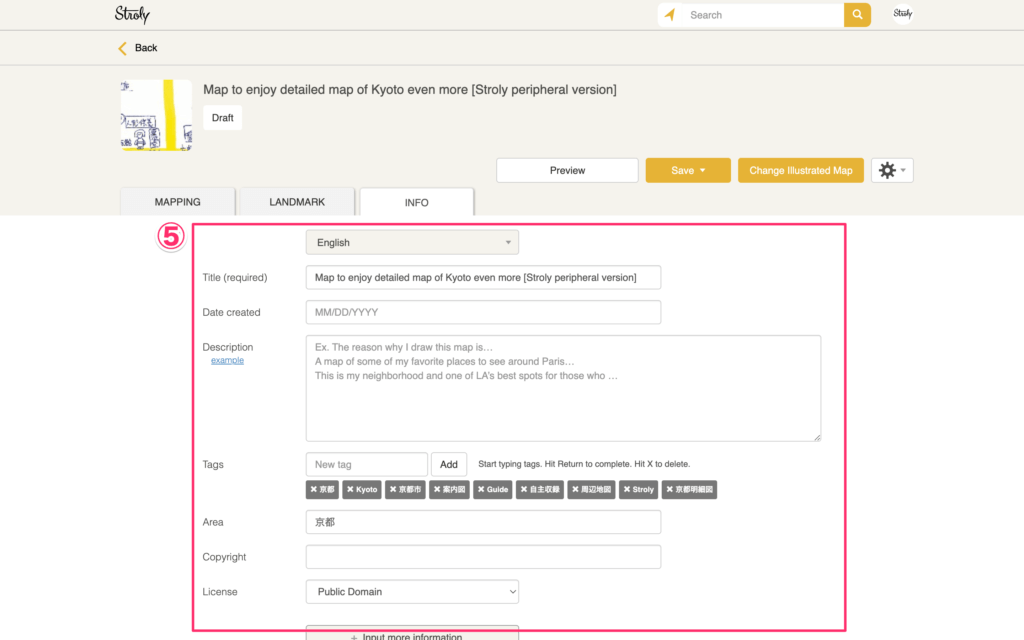
5.Enter the necessary information in “INFO”.
6.Click “Save” > “Save” to save the configured information.
7.Click “Save” > “Public” or “Private” to publish the map.